Friday, September 30, 2011

Hanging With the In-Laws in Lake Tahoe

After a jam-packed two days in San Francisco
we headed north-east for Lake Tahoe.
The trip was filled with winding roads
and a small panic attack when I thought we were going to run out of gas,
but four hours later we pulled into town 
with the sun shining bright overhead.
A nice change from the foggy days in the city.

Shortly after arriving, we headed down to the lake for some drinks on the pier.
We soaked in some sun while I tried to not get seasick on the rocking pier.


We don't make a habit of wearing matching outfits.
Maybe we were both inspired by the blue lake?

The next morning I enjoyed breakfast on the deck
before we headed out to the beach.
Not a bad view from my in-laws' house, huh?


I'd never been to a beach surrounded by pine trees
and snow capped mountains.
It was beautiful.  And hot.
Unfortunately my iphone pics don't do it justice.


That night, the hubs cooked his new specialty,
Beer Can Chicken,
while we lounged around
and watched the sunset over the lake.


Before meeting my hubby, I had never been to Lake Tahoe.
Now, whenever we go, I am constantly in awe of how beautiful it is.
Words cannot describe the crystal blue color of the lake.
The crisp air and big pine trees
are such a nice break from the smog and traffic of LA.


Thursday, September 29, 2011

San Francisco - Giant Bridges and Giants Baseball

After visiting the Japanese Gardens 
we hopped on the bus and headed over 
to the Golden Gate Bridge.

I've seen the bridge several times in my life
but it never fails to amaze me.
This is the first time I've walked out onto the bridge
which was slightly terrifying.
The wind combined with crowds of walkers and cyclists
and cars whizzing by made my heart pound.


Next we headed to Fisherman's Wharf for
clam chowder in a bread bowl
and some seal watching.
Along the way, we got passed by a group on a Segway tour.
Possibly the funniest thing I've seen in a long time!


To finish off our trip, we got tickets to the Giants game,
the hubby's favorite team.
AT&T Park was much nicer than Dodger Stadium,
and it was a nice change to cheer for the Giants and not fear for our lives.
And to top it off, the Giants won
making the hubs very happy.


The next morning we headed out for Lake Tahoe,
the most beautiful and blue lake I've ever seen.

Stay tuned!

Tuesday, September 27, 2011

San Francisco - Japanese Gardens

The second day of our San Francisco getaway
involved heading out to Golden Gate Park 
and the Japanese Tea Gardens.

The Gardens were absolutely beautiful,
definitely one of my favorite parts of the trip,
and the misty foggy weather just added to the mystical setting.

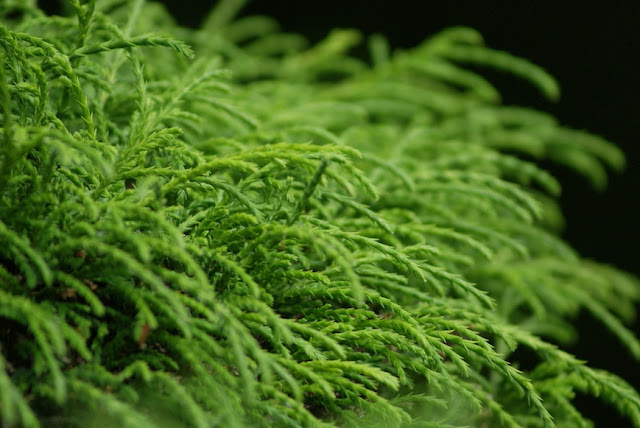
On this day I only brought my new zoom lens
which provided a challenge to take photos in a new way.
I actually love how a lot of these pictures turned out.


Monday, September 26, 2011

Strolling Through San Francisco

A month or so ago, the hubs and I took a long weekend to San Francisco and Lake Tahoe.
The first few days were spent exploring the city -
wandering, walking, eating, and seeing the sights.
Then we headed to Lake Tahoe for a couple days to visit the in-laws.
We had a great time - It was a much needed break from regular life.

We drove up from Los Angeles early Friday morning,
stopping in Santa Cruz for lunch with a friend.
We got into the city mid afternoon
checked into our hotel and took off to explore.

Hilly streets and the Bay Bridge
It's so tall!
Jumping for joy!

Can you find me?
Nope, not me
Just hanging out in the Embarcadero.  Literally.

Somehow a naked bike ride just doesn't seem that comfortable,
or sanitary.
Maybe it's just me.

I love the guy to the left with just the top of his jeans.
Is that providing any function?

That first night we had a wonderfully romantic dinner at Fleur de Lys
then stopped for a drink at another hotel bar.

The next day brought the Japanese Gardens,
Golden Gate Bridge,
and a Giants Game.

Stay tuned!

Sunday, September 25, 2011

Sunday Buttermilk Pancakes


Sunday mornings are one of my favorite parts of the weekend.
And there's no better way to enjoy an Sunday morning than having a yummy breakfast on our balcony.

A few weeks back I made some biscuits and had some leftover buttermilk in our fridge.
And I hate letting things go to waste.
So I did my obligatory google search, and found this recipe from Joy of Baking.
The Joy of Baking is one of my go-to sites for baking recipes -
They have an extensive list of recipes which always turn out beautifully,
and this was no exception.

These pancakes are super easy to make and came out so fluffy.
SO much better than boxed mixes, and only a few more steps.
I highly recommend these if you have some buttermilk.
And if you don't, you can make your own by putting 1 Tablespoon of vinegar or lemon juice in a measuring cup and adding enough milk to equal 1 cup.
You learn something new every day, right?!


Buttermilk Pancakes
from Joy of Baking

1 cup all purpose flour
1 teaspoon baking powder
1/4 teaspoon baking soda
1/4 teaspoon salt
2 Tablespoons white sugar
1 large egg, lightly beaten
1 cup buttermilk
3 Tablespoons unsalted butter, melted
extra butter for greasing the pan

Heat oven to 200 to keep pancakes warm.

In a large bowl whisk together the flour, baking powder, baking soda, salt, and sugar.

In a separate bowl, whisk the egg, buttermilk, and melted butter.

Make a well in the center of the flour mixture.  Pour in the egg mixture and stir until just combined.  Don't overmix - the batter will have some small lumps.

Heat a frying pan or griddle over med high heat.  A few sprinkles of water should sizzle when the pan is ready.  Lightly butter or oil the pan.  Pour about 1/4 cup of batter onto the pan.  When the bottom of the pancake is brown and the top is covered with bubbles, flip the pancake over.  Repeat with remaining batter.  Keep the finished pancakes warm in the oven.

Serve with maple syrup and enjoy!


Cheeto always hopes to catch some extra pieces, but he was out of luck this time!


Friday, September 23, 2011

Happy Fall!


Happy Fall!

It's officially my favorite season,
Bringing cooler, crisper air
colorful leaves
and cozy, comfy clothes.
Oh yeah, and my birthday!

This week has been a long one, hasn't it?
I don't know what it is but I am just exhausted - 
coming home every night to crash on the couch.
Which explains why I haven't posted anything this week.
Sorry about that!
Next week will (hopefully) bring some new posts and recipes.

I am playing along with Lauren's Fill In The Blanks Friday again.
Head on over to her site if you want to play along!

1.   The best thing I did all week was   go to a Dodger game with the husband and friends, and watch the Giants win.  It's always more fun going to sporting events when the hubby's team wins.

2.    Chocolate chip cookies      make me super happy.

3.  Pets are   an essential part of the family.  Cheeto is our baby and gives us so much love in return   .

4.    My friends and family   is the best thing about my life.

5.  With the cooler weather I am looking forward to    cozying up on the couch with a blanket, wearing comfy sweaters and leggings, and pumpkin spice lattes.

6.  Something that's on my "wish list" right now is     oh so many things - my closet is pretty pathetic and I would love to go on a huge shopping spree to update it - cute tops, new boots, a new winter hat... 

7.  This weekend I am going to    sleep in and lay low.  This week has been exhausting and I just want to veg out.  I may also go visit my friend her her new 10 day old baby .

Wednesday, September 14, 2011

No Knead Peasant Style Bread


I have always loved baking, ever since I was little.
Cookies, cakes, pies...you name it and I liked baking it.
But for some reason, bread always scared me.
It seemed like something those other, more serious bakers made
with all the kneading and punching,
which I'm not sure I know how to do.

So imagine my delight when I found this post over at one of my favorite blogs, A Chow Life.
No Knead Bread?  Really?  I didn't know that was possible!
Suddenly the door to homemade bread had been opened.
And I ran right through.

(Clearly I'm a little late to the game.  
It seems food bloggers got a little crazy about this no-knead bread several years ago, as seen here)


The recipe was super easy.  
I just involves some time for the dough to rise twice,
so make sure you start a day early.
I thought the bread turned out great and my husband loved it.
It was beautifully brown with a crunchy crust.
Next time I may try making it in more of a loaf shape to use for sandwiches.

Peasant Style Pot Bread
from A Chow Life

4 cups unbleached all purpose white flour, or white bread flour
1 teaspoon sugar
2 teaspoons salt
3/4 teaspoon instant, fast rising, or bread machine yeast
2 cups ice water, plus more if needed
oil for coating dough (corn, canola, vegetable, etc)


First Rise:  In a large bowl, combine flour, sugar, salt and yeast. Vigorously stir the water into the bowl, scraping down the sides and mixing until the ingredients are thoroughly blended. If the mixture is too dry to incorporate all the flour, stir in more water, a little bit at a time.  Use just enough to blend the ingredients. The dough should be very stiff - don't over moisten.  Brush or spray the top with oil. Cover the bowl with plastic wrap. For best flavor, refrigerate the dough for three to 10 hours. Then let rise at cool room temperature for 18 to 24 hours. If you can, vigorously stir the dough once about halfway through the rise.

Second Rise: Using an oiled rubber spatula, gently lift and fold the dough in toward the center, all the way around, until mostly deflated.  Don’t stir the dough, just fold it. Brush or spray the surface again with oil. Re-cover the bowl with plastic wrap that has been coated with nonstick spray.  Set aside at warm room temperature to rise for 1.5 - 2.5 hours.  Dough should double from its deflated size.  Remove plastic wrap if you need to.  See the original post for a few other rising options.

Baking:  Twenty minutes before baking time, put a rack in the lower third of the oven and preheat to 450 degrees. Heat a 3 1/2- to 4-quart heavy metal pot or Dutch oven in the oven until hot, then remove it using heavy mitts (obviously).  Carefully, without burning yourself or deflating the dough, loosen it from the sides of the bowl with a spatula and invert it into the pot.  Don't worry if it looks lopsided, it will even out with baking.  Generously spritz or brush the top with water.  Put the lid on the pot.  Shake back and forth to center the dough.

Bake on the lower rack for 55 minutes.  Reduce the heat to 425 and remove the lid.  Bake for 15-20 minutes longer, until the crust is nicely browned.  A skewer stuck in the middle should come out with just a few crumbs.   Cool in the pan on a wire rack for 10-15 minutes.  Remove the loaf from the pan and cool completely on the rack.  


Enjoy!